|
This page will explain the first steps to take with your teaching process, the instructions here can be used with students of all shapes and sizes. |
|
Before you start... |
|||||||
|
Even before you start the process explained on this page you must spend time building a relationship with the animal which will become your student. Talk to it, play games with it, read to it, just being around and letting it know you are there can be sufficient. |
|||||||
|
Every animal is different, and in order to succeed, you the teacher, must know all about your student. You will be able to recognize when they are happy, angry, or depressed. What they do, and do not like. What is their favorite treat? What kind of music do they like? Begin to recognize every facial expression and understand what they all mean. |
|||||||
|
This knowledge will be your most valuble asset. This is the most important step in the training process as it is the foundation for all the work you will do with the student in the future. And yet, still above all that, it will make your learning/teaching process much more fun and enjoyable for both you and your student. It will feel less like working with a stranger and more like spending time with a dear friend. |
|||||||
 |
|||||||
|
1. Conditioning |
|||||||
|
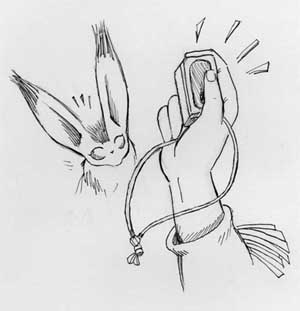
The first step that you want to take with your student is to have them make the association between the marker signal and the reinforcer. Simply put, we want them to think, "When I hear a click...something good will happen". To help them make this connection, follow these simple steps... |
|
|
||||||||||||||||||||||||||||||||
|
Repeat these steps a few times. Then watch your student carefully...click the clicker... but don't give them a treat right away. If the animal looks at you as if to say "Well? where is it?" they now realize that click-means-treat... and you can go on to the next step. |
|
Oh... and DO give them the treat for doing such a good job!! |
|||||||||||||||
|
If the student doesn't understand this concept yet. Repeat the above steps some more times. Don't get discouraged (you're just starting remember) you can always come back later and try it again, this may be a good idea for young students. In fact each teaching session should really not last longer than five minutes each. Keep the lessons short and simple to avoid them from getting tedious. |
|||||||||||||||
|
I've done this with a variety of animals, however, horses were the most receptive learners. After only one 'click-and-treat' they understood what it was all about and were ready for the next one. A miniature goat was also very quick to catch one after only one or two tries. Cats, because of their nature, take a little bit longer to grasp this concept. Oftentimes at first, the cat would rather wander around and sniff at things than listen to whatever you have to say. Finding something that they really like to eat is probably your best bet, keep trying steps one and two until you see results. |
|||||||||||||||
|
2. Introduce the Target |
|||||||||||||||
|
Now that the student knows what the "click" means, they will start to wonder "Now how do I train this person to click that thing more often?" |
|||||||||||||||
 |
|||||||||||||||
|
This is where the target comes into use. On the Tools page targets were described as a long thin object that could be used as a pointer. The next goal that we have is to have the student learn that they must touch the end of the target to get a click and the treat. This is called Shaping a Behavior. |
|||||||||||||||
|
Note: this is much more than simple Operant Conditioning (i.e. Pavlov's dogs responding to a ringing bell) With operant conditioning the animal is trained to perform an action as a response to a certain stimulus, they don't understand what it means or why they are doing it. We want to encourage the animal to think for itself and understand what each request that we give them means. They don't receive a click and treat until after they have done what the teacher has asked them to do, and this is all done on a voluntary basis, never force the student into anything as that will just lead to frustration and resentment on both sides. |
|||||||||||||||
|
The first step you take with the target is to let them see it, sniff at it, get comfortable about having it around. Some horses worry at first that it might be something that will be used to hit them with and will flinch or shy away if it is even brought near them. Slowly move the target all over their body, across their neck, down their legs, raise it up above their head, while all the time talking softly and petting them for reassurance. In time the horse will feel less nervous about the target and it will actually become a welcome sight as it means another game where food is not far away. |
|||||||||||||||
|
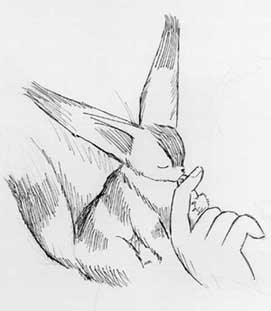
The next step that we want to take is to have the student understand that the purpose of the target is that it is something that they must touch in order to get the next click and treat. With your clicker in hand, hold the target close to the students nose where they can easily reach out and touch it. Some animals, out of curiosity will automatically touch the target or at least advance to take a closer look at it. Immediately reward any slight movement towards the target with a click and treat and generous amounts of praise. |
|||||||||||||||
|
If no movement is made, and the student doesn't show any signs of interest, you might have to be the one to touch the target to their nose for them.Of course, still give them a click and treat eventhough they really didn't do anything on their own. Now that they know food is involved they should start to show enthusiasm. |
|||||||||||||||
|
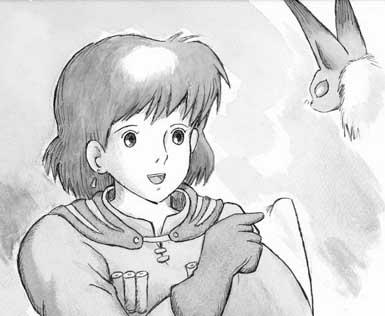
Now, to test the student... hold the target either a bit to the left or the right of their head or take a step backwards and hold the target in front of them. If the student make the movement towards the target themselves, they now know what the target means and what they should do when you are holding it for them... give clicks, rewards, and much patting!! Repeat these steps often, try moving around a bit and see if they follow you. Make this a game that you play everyday but remember to make variations so neither of you lose interest in what you are doing. |
|||||||||||||||
|
3. Add a cue |
|||||||||||||||
|
Now that the student knows what both the clicker and the target means, it is time to add a few simple cues. These include verbal requests, hand signals and other types of body language. These will make it easier to communicate with the students and make the learning process more precise. |
|||||||||||||||
|
As different cues and request vary in effectiveness and usefulness with the size of the student, these will be discussed in further detail in the next three sections... |
|||||||||||||||
|
-----Unfortunately these next sections are not quite ready to be released. Please send me an e-mail if you would like for me to let you know as soon as they are posted!! |
|||||||||||||||
|
All text and artwork, unless otherwise specified, by Griffin Waldau. Updated December 20, 2000. |
||||||||||
|
||||||||||
|
-- |
||